Lesson 3: The 5 Basic Chords
[HOME]
[PART 1-THE BAISCS] L1: Terms & Supplies * L2: The Strum * L3: The 5 Basic Chords * L4: Playing 1st Song
[PART 2: DIGGIN’ IN] Guitar Tuning * Music Theory * Transpose * More Chords
[PART 3-PLAYING BASS] Playing Bass.
[PART 4-SONGS] Songs
The Five Basic Chords
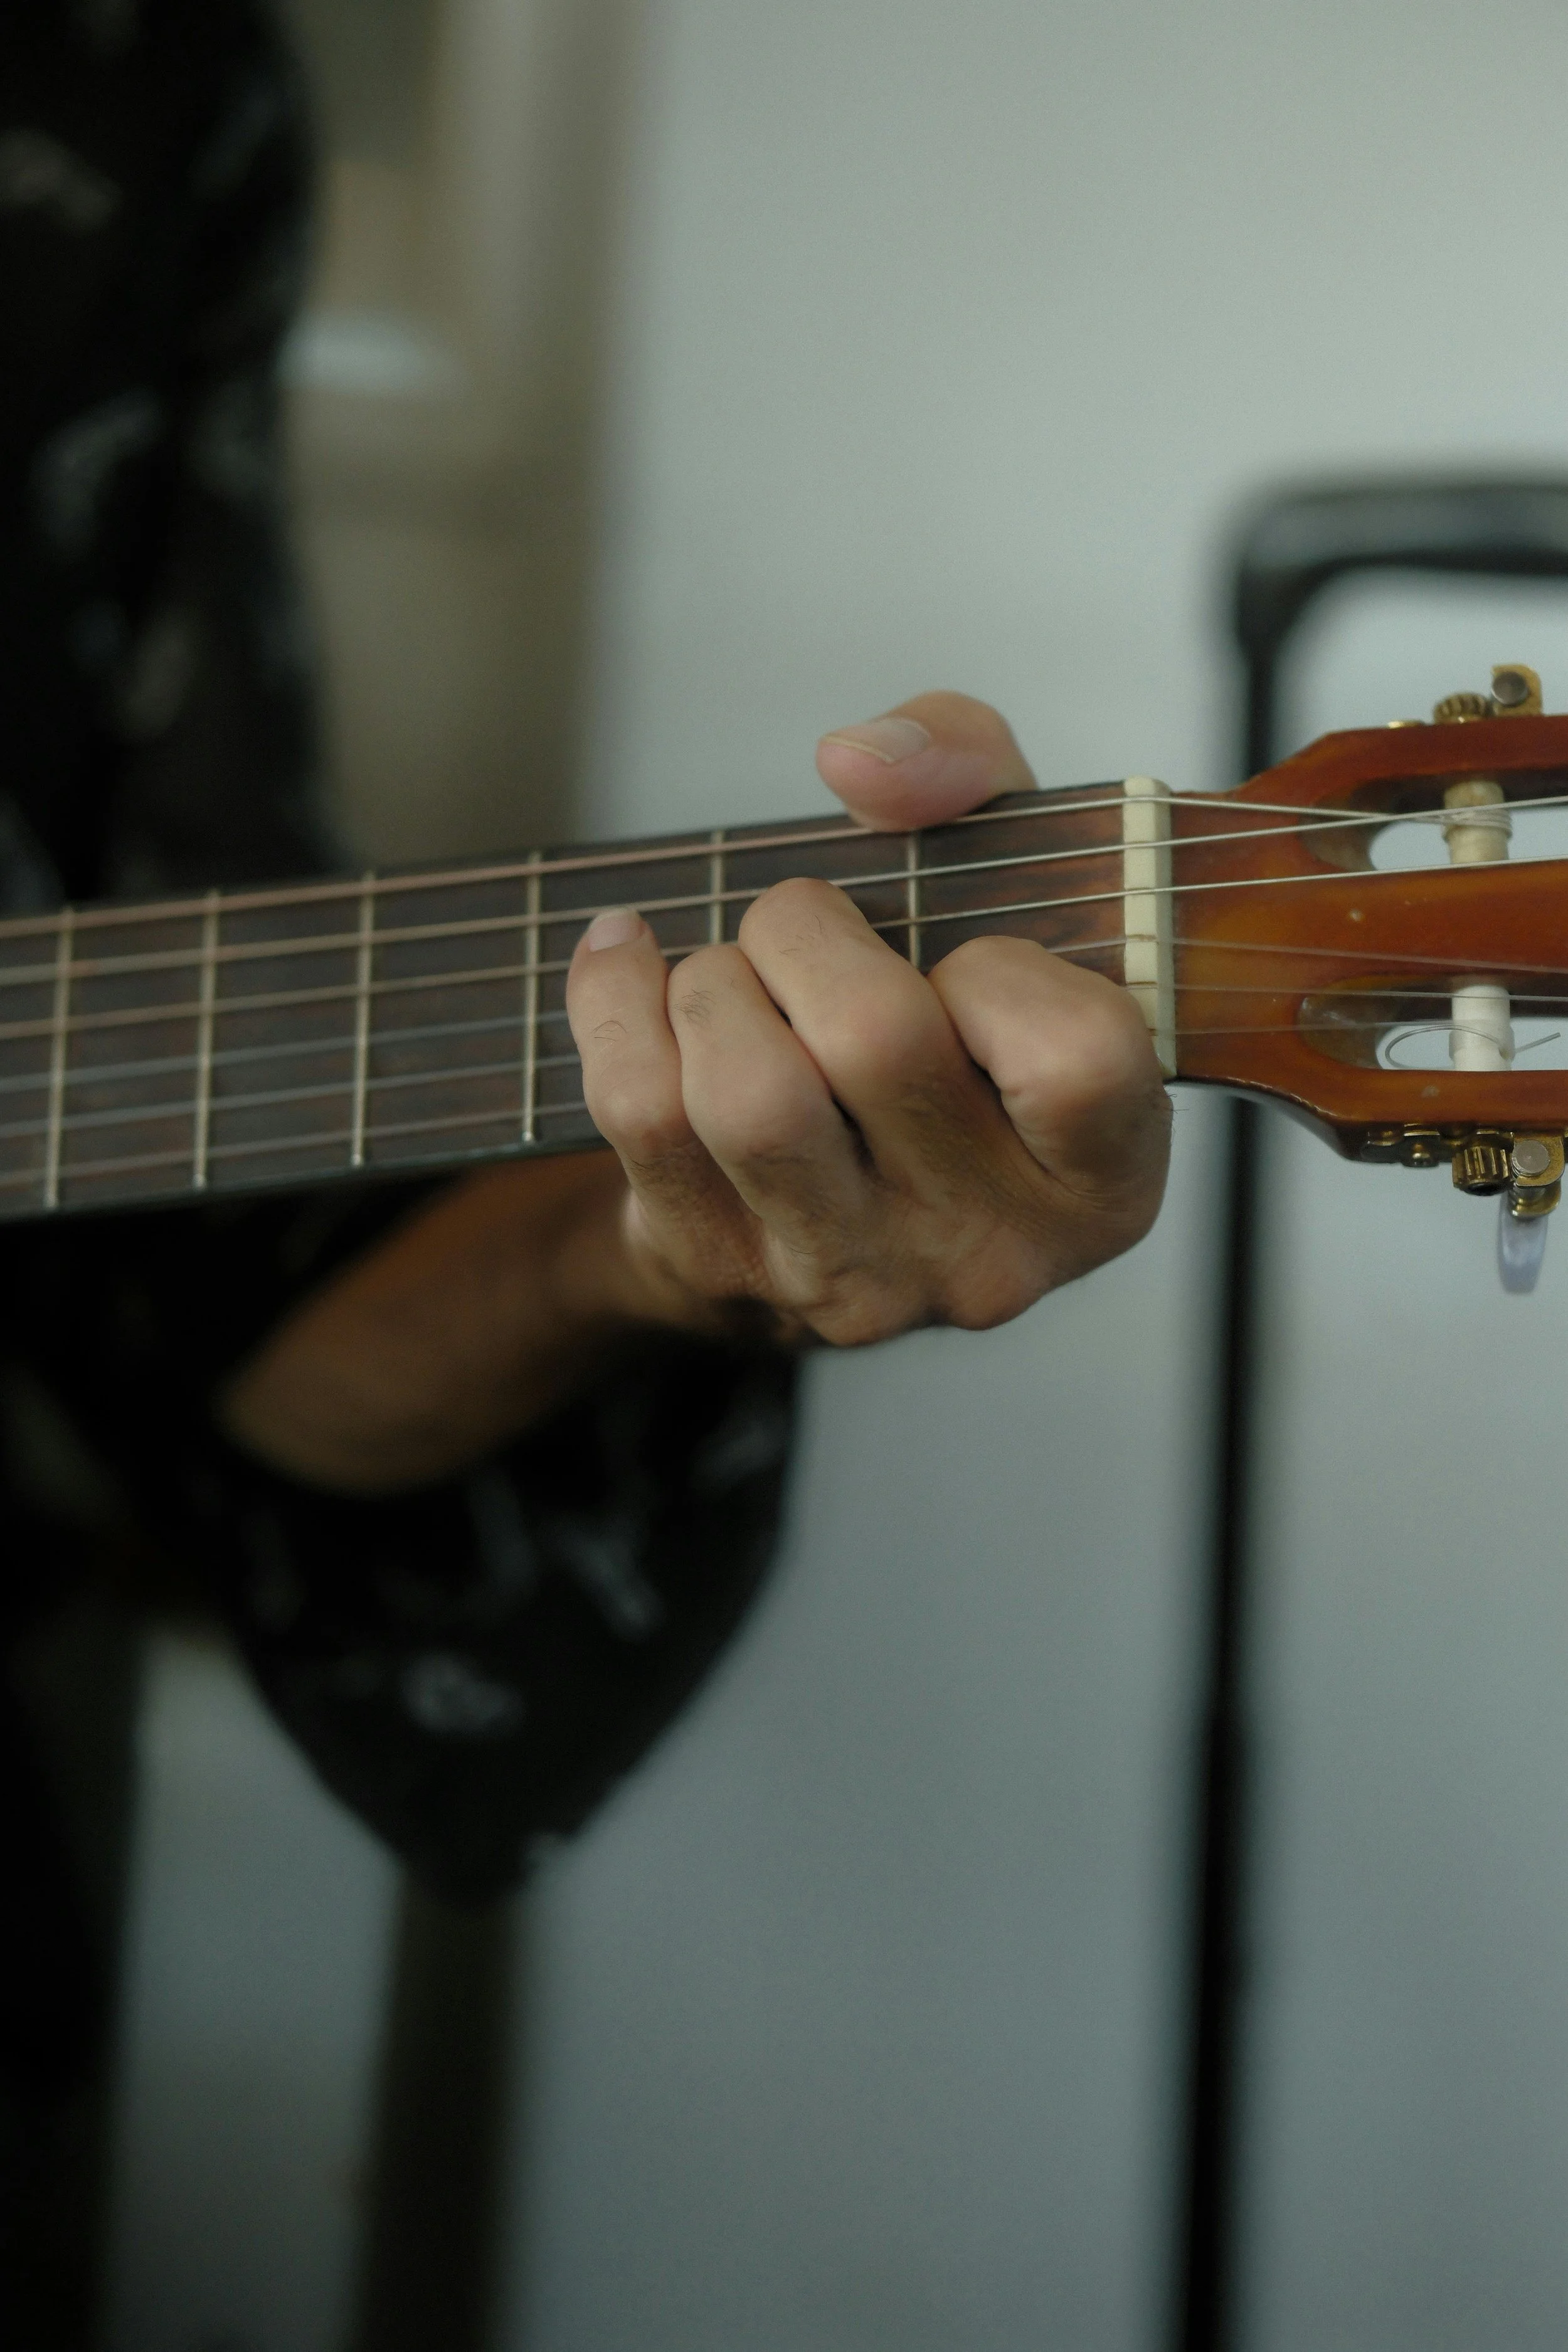
There are Five Basic Chords that we will learn for the first part of this course. We will be able to play several songs. They are in the key of G (more on what a key is later). The chords are G, C, D, Em, and Am. Below are descriptions and pictures of where to place your fingers.
0 = open,1=index finger, 2=middle finger, 3=ring finger, 4=pinky, X=don't play

Download this worksheet. Place a dot in the frets where your finger go.
When you first place your fingers on the fretboard to form a chord, you need to be sure you are just behind the fret (the raised metal strip) so a good sound will be made. Position your fingers so the tips are pushed down on the strings to create the chord. Yes, this will be very painful and awkward for a while. In fact will feel like the 1st string (the littlest) is a cheese cutter on your ring and pinky finger! But it will get easier and feel more comfortable the more you practice. Build up those calluses.
Go ahead and position your fingers on the G chord. Take your pick and pluck each string to see if you are making the proper contact with your fingers. Beginners typically do not make proper contact because the fingers are not used to stretching in such weird positions. Just like you have to do exercises and stretches for your body, your fingers require a little training, too. Your fingers may get in the way of another string's sound. It’s okay for now. (You will eventually want to keep playing that chord until you can make a strong sound on each string..)
Do the same for the C chord, and the D chord. Then go back to the C chord and then slide your 2nd and 3rd fingers into the 2nd fret and lift up your pointer for the Em chord. Practice going back and forth between those two chords. Then start again with a C chord and take your ring figure and move it under the 2nd figure in the same 2nd fret. Practice switching between C and Am doing one DOWN strum for each. Work on getting faster and cleaner. Once you have learned the finger positions, you need to practice moving to each chord as quickly as you possibly can. You need to live and breathe these chords until you can do them in your sleep.
G chord
D chord
C chord
Em chord
Am chord
WHEN you can get these chords down, you’ll be able play a ton of songs. But you have to practice. Remember, those first and second strings are going to really hurt until you get callouses built up. You have to keep at it. You got this.
Practice Skills
PRACTICE SKILL 1: One practice method is simply to strum DOWN one time with your fingers on each chord we have learned so far:
Position your fingers on G and strum DOWN one time. Then move to the C and the D. Then start with the C and slide into the Em. Go back to the C and slide into the Am.
Then practice going as fast as you can. Strum a G chord and then move to the C as fast as you can. When you have your fingers in the right position (or at last close) then strum. It won’t sound very good, but that is okay. We are just trying to get your brain and fingers trained to move quickly between chords. We’ll work on making it sound better later. Hey, this is just the first lesson.
Repeat.
Change up the order. Go from G to C to Em to D to Am and back to G. You can go in any order you want; just start with G and end with G. The rest is up to you. Write your own song! That’s how professionals do it.
Do the C to Em to C to Am to C over and over again with the strum. Work on getting faster.
PRACTICE SKILL 2: Another way to practice is to combine our DOWN, DOWN, UP, UP, DOWN, UP strum pattern for each chord. This will be rough, but again, it’s okay. Do the grandfather clock motion with your right hand to keep your movements smooth.
Form the G chord. Strum DOWN, DOWN, UP, UP, DOWN, UP. Repeat that several times.
Form the C chord. Strum DOWN, DOWN, UP, UP, DOWN, UP. Repeat that several times.
Form the D chord. Strum DOWN, DOWN, UP, UP, DOWN, UP. Repeat that several times.
Form the Em chord. Strum DOWN, DOWN, UP, UP, DOWN, UP. Repeat that several times.
Form the Am chord. Strum DOWN, DOWN, UP, UP, DOWN, UP. Repeat that several times.
Repeat.
As fast as you can
PRACTICE SKILL 3: Another practice skill that you can work on is trying to get a clean sounding chord. You don’t have to do this skill right now. You could go on to Playing Your First Song and then come back to this one.
Form a G chord. Then pluck each string. You will probably have some dud-sounding notes. That is normal. Move your fingers, and bend the first knuckle so that you are pressing the strings with the TIPS of your fingers. You may need to stretch your finger farther. Be sure you are just behind the fret. If you are too far away from the fret, it will make that dud or rattle sound.
Do the same with the other chords. Be sure you realize that we don’t always play ALL of the strings for each chord. Look at the pictures above again.
G chord - Play all of the strings
C chord - Do NOT play the 6th string (at the top). It is marked with an x in the picture. You will have to shorten your strum a bit or you can muffle that top string with your thumb (which is hard) or your ring finger.
D chord - Do NOT play the 5th AND 6th string (at the top). They are marked with an x in the picture. You only play the bottom 4 strings. You really have to make your strum smaller for this one.
Em chord - Play all of the strings
Am chord - Do NOT play the 6th string (at the top).
PRACTICE SKILL 4: The final practice skill that you can work on is getting faster on EACH chord.
Form a G chord and strum it. Take your fingers off and then make the G chord again as fast as you can.
G chord - Play all of the strings
Take your fingers off
G chord - Play all of the strings
Take your fingers off
G chord - Play all of the strings
Take your fingers off
Repeat the other chords.
Your goal is now to get faster. You could have someone call out a chord, and you have to play it. That will help your brain and fingers to learn to work together.
Try playing one strumming the G, then C, then the G, and then the D, and you have the first part of Amazing Grace. Disregard the G7. Practice through it.
Now, we’re ready to play our 1st official song as a class. It works really well with our strum pattern.
Oh, yeah, be sure to come back to these practice skills after you work on the song. We have to get faster and cleaner.
PLAY GUITAR: [HOME] L4: Playing 1st Song